How to make breakfast from scratch
Every morning, after I’ve stumbled out of bed and through the shower, I make some breakfast to fuel myself through the morning. I often simply have toast with butter. I explain in The Knowledge the fundamental reasons why humanity eats bread and why butter is so useful.
 But how many of us actually make breakfast from scratch? I mean really from scratch – growing your own wheat and making butter out of milk fresh from a cow?
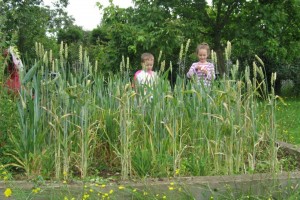
Well, Dr Sarah Bearchell (Facebook page: Sarah’s Adventures in Science) has run a project doing exactly this with school children. Working with a group of pupils from a primary school in Oxford she showed them how to cultivate their own wheat, harvest, thresh and winnow the grain, and then mill into flour for baking a loaf of bread, as well as using their own simple butter churn. This is a wonderful education project on the basics of how things we take for granted are actually done. Read here about the project in Sarah’s own words:
Have you ever thought about bread? I mean, REALLY thought about bread?
Some of you might find the kneading and resting of the dough very therapeutic – I know I do. But can you really say that you made that loaf? The children of Garsington CE Primary in Oxfordshire start their annual Harvest Loaf in March with bare earth and some grain. This project has been covered by the BBC.
Bread
So, how do you grow a loaf?
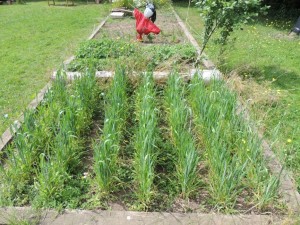
 Obtain your wheat seed. We usually use some saved seed from the previous year and boost it with some untreated wheat seed from our local agricultural seed merchant. You can also buy wheat seed on the internet. Try to get bread-wheat so that it has the high gluten content you need for a beautiful soft loaf.
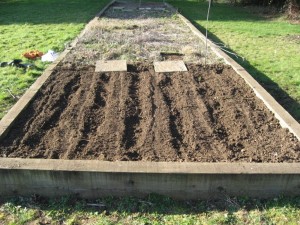
- Select your ground. Somewhere well-drained and without huge amounts of stones. It should ideally be in full sun but shade for a short part of the day will be fine. A 2m x 2m plot should give you enough grain for a loaf.
- Dig the earth over. The soil needs breaking up to at least the depth of a garden fork if you want your crop to grow well. Take out all the weeds, bits of roots and large stones as you dig. Add in your chosen fertiliser at this point – well-rotted manure or all-purpose plant food will suffice.
- Rake the soil out. This will remove large lumps of soil and make it easier to get straight lines of plants (which will make weeding easier).
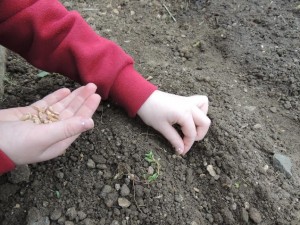 Plant your seeds. March is ideal for most of the UK as the soil is beginning to warm. Remove any weeds from the plot. Use a string line or the rake handle to mark the line for your seeds. Make the rows about 15cm apart. Plant the seeds about 2cm apart and about 2cm deep. Cover the seeds with soil and press down gently. You may wish to water them in to speed germination.
- Be patient, look for signs of birds and mice eating the seeds. You might need to add a scarecrow.
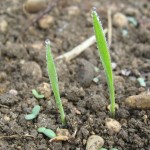 Hooray! The seedlings will emerge and you should have lines of green shoots after about three weeks. If there are gaps in your crop, fill them with more seed.
- Watch, weed and water. Throughout the summer you will need to keep an eye on your crop. Use a hoe or hand-weed between the lines of plants. There should be no need at all to water but if there is a prolonged dry period, it may be worth giving the soil a good soak. Do not be tempted to water a little every day because this just leads to shallow roots and a less drought-tolerant crop.
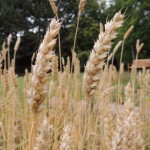
 Follow your crop’s development. The crop will go from single blades to bushy little plants during April and then it starts to grow upwards. By mid-June you should have a tall green crop of plants with their ‘heads’ waving in the wind. By July the heads should be starting to plump up as the plant fills the seeds with starch. By August these will start to turn from green to gold.
- Is it ready yet? Turning golden is not the only thing you need to check before harvest. In early September the grains should be plump. Carefully remove a grain, peel off the outer coatings and squeeze it with your thumb nail. If it is hard, it’s ready for harvest. If it produces a milky substance, give it at a week before re-testing. Always check a few grains across your whole crop. Aim to harvest your crop before the third week of September because otherwise the damp nights will lead to mould development.
 Choose a dry day and wait for the dew to evaporate so the plants are as dry as possible. Use secateurs or scissors to cut your crop about 5-10cm from the ground. If you have a scythe, you could use that. Collect up your crop and use about two handfuls to create a small sheaf. Tie it with string or straw.
- There is a good chance your plants will be damp. Hang the sheaves somewhere dry and with good airflow for a week.
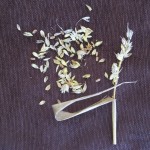 You will need to separate the grain from the stalks. To do this you can rub the seed heads firmly together in your hands or thrash them against a hard surface. I’d recommend the former if you have a small amount of wheat. Collect up your grains.
- You will need to separate the grain from the chaff (bits of seed coating and stalk). You can do this on a day with a light wind if you lay out a cloth on the ground and gently throw the harvested mix up into the air. In theory, the heavy grains should fall directly to the ground and the lightweight chaff will be blown away. You can also do this by placing the grain in your hand and blowing away the chaff, fanning with a paper fan or by letting it fall in front of an electric fan so the chaff is blown away. Collect your grain and store it in a paper or cotton bag.
- Speak to your local water or windmill. They are generally run by wonderful volunteers who will be just as excited about your loaf as you are! Alternatively you can grind it at home, between large stones if you are dedicated, or by using a coffee mill if you are not. When you grind your grain you will get a mixture of components:
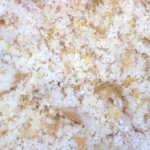 Bran – this is the seed coating. You can remove some of the bigger pieces by sieving. This improves the chances of your bread rising but still leaves you with very nearly whole-grain flour with a lovely nutty taste and brown colour.
- Semolina – the hardest part of the grain. If you use a water or windmill they will have a mechanism of removing this but it’s not essential.
- Flour – not the fine white powder you are used to!
- Now that you have your flour you can turn it into bread. Use your favourite bread recipe to make a loaf. The children at Garsington CE Primary work with Mrs Hales (who is exceedingly talented and infinitely patient) to make a wheatsheaf-shaped loaf.
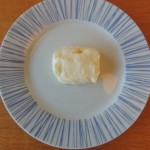 Butter
Butter is really easy to make, provided you have a source of cream and a clean jar.
Cream is a ‘fat-in-water emulsion’ with tiny globules of fat (a bit like water balloons) floating around in a watery matrix. To make butter, you have to smash open these globules to release the butter fat. The butter fat then sticks together with bits of the watery matrix trapped in it. We call this a ‘water-in-fat emulsion’. But I digress…
Try this:
 Allow your cream to reach room temperature. This makes your job easier because it’s easier to smash open the little fat globules to release the butterfat.
- Find a clear jar with a good lid. It is easiest if your jar is only about 1/3 full, this gives you lots of room. I cannot over-emphasise the need for a well-fitting lid – when I do this with children, I also add duct tape to prevent leakage and limit fate-tempting nosiness.
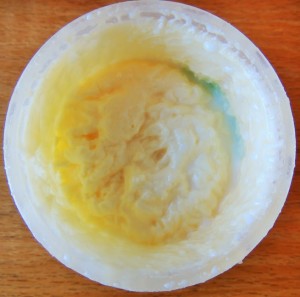
- Assemble your butter churn. Place your cream in the jar, secure the lid and start to shake it.
- Start churning. Shake it hard, really hard. You are trying to smash open those little fat globules. Keep shaking the jar!
- Check progress every five minutes, until you find a lump formed inside the jar. This lump is the water-in-fat emulsion I described at the start. We need to remove some of that water.
 Drain your butter. Line a sieve with a clean tea towel or baby muslin. Pour the contents of your pot into the sieve. The liquid which comes off is buttermilk and can be drunk or used for making sodabread and other yummy stuff.
- Clean your butter. Place the lump of butter in icy cold water. Squeeze it and work it in the water. This will wash away any buttermilk (and therefore slow the rate at which it goes rancid) and cool it down into an easy-to-handle form.
- Optional step. If you like salted butter, add about half a teaspoon of salt per pint of double cream and adjust to suit your taste. Adding salt will also help preserve it.
- Form your butter into a shape. It is now ready to eat.